
Materials:
- Egg cup
- Fabric scrap (approx. 5” square)
- Polyfill
- Needle Thread
- Glue gun glue
Directions:
1. Draw a 4” circle on the back of your fabric scrap. I used the bottom of a small dish to trace around. Cut out around the circle, approx. ¼” from your drawn line.
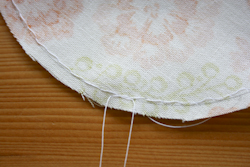
2. Baste stitch around your drawn line, leaving long tails at the start and finish.
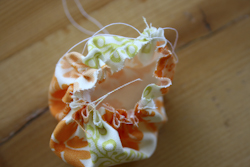
3. Pull your long ends on one side (I pulled on the back side of the fabric) to gather into a pouch.
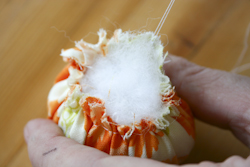
4. Stuff the pouch with Polyfill, keeping thread pulled tight.
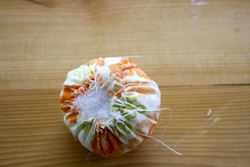
5. Knot your threads, keeping the opening on the pouch as small as possible. Stuff with a little more Polyfill if you need to. The firmer you stuff it, the more rounded your cushion.
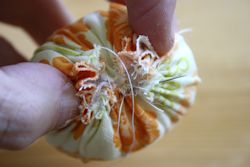
6. With your needle and thread stitch the opening all the way closed. I worked from one side to the opposite for a few stitches, and then did the opposite direction a few times.
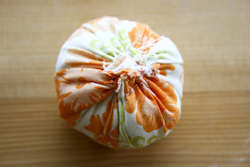
You should now have a closed cushion as shown.
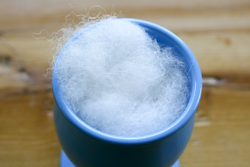
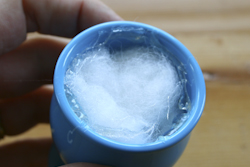
7. Take a nice sized wad of Polyfill and roll it around in your hands to mat it together a little. Stuff inside your egg cup. You want it to fill the cup about ¾ of the way when compressed slightly.
8. Run a line of hot glue around the top edge of your egg cup
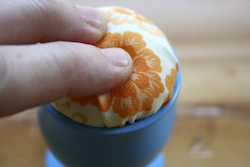
9. Press your stuffed cushion inside of the egg cup and hold for a few seconds, allowing for the glue to dry.
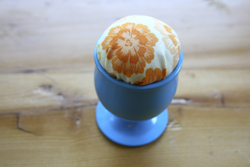
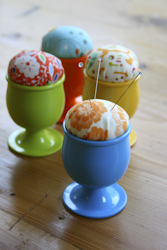
That’s it! You’re done. You now have an egg cup pincushion. Now go make some more!
No comments:
Post a Comment